Create and manage your account
Updated 22 November 2021

© Crown copyright 2021
This publication is licensed under the terms of the Open Government Licence v3.0 except where otherwise stated. To view this licence, visit or write to the Information Policy Team, The National Archives, Kew, London TW9 4DU, or email: [email protected].
Where we have identified any third party copyright information you will need to obtain permission from the copyright holders concerned.
This publication is available at /government/publications/how-to-use-the-hmcts-e-filing-service/create-and-manage-your-account
1. Before you start
Before using this guide, please visit our main guidance page on the HMCTS E-Filing service for citizens and professionals. This explains:
- what the E-Filing service is
- what you need to know before you start
- what happens after you have submitted a filing
- other ways to submit filings (if you cannot use the E-Filing service)
- how to get further advice and support
To use the E-Filing service, you’ll need to make sure that you have all your documents and information to hand. This includes:
1. digital versions of anything you wish to send to HMCTS:
- court or tribunal forms
- evidence in support of a claim
2. your payment details
- credit or debit card
- help with fees reference number
- Payment by Account (PBA) number (for legal professionals)
If you experience any technical issues, please email [email protected].
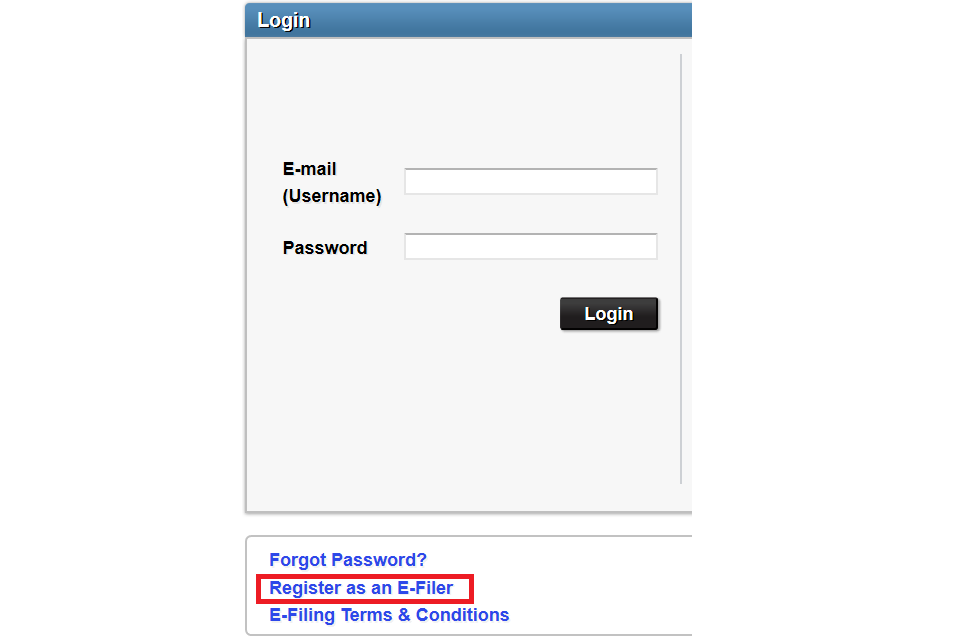
2. Create an account and log in
1. Visit the and select ‚ÄòRegister as an E-Filer‚Ä�.
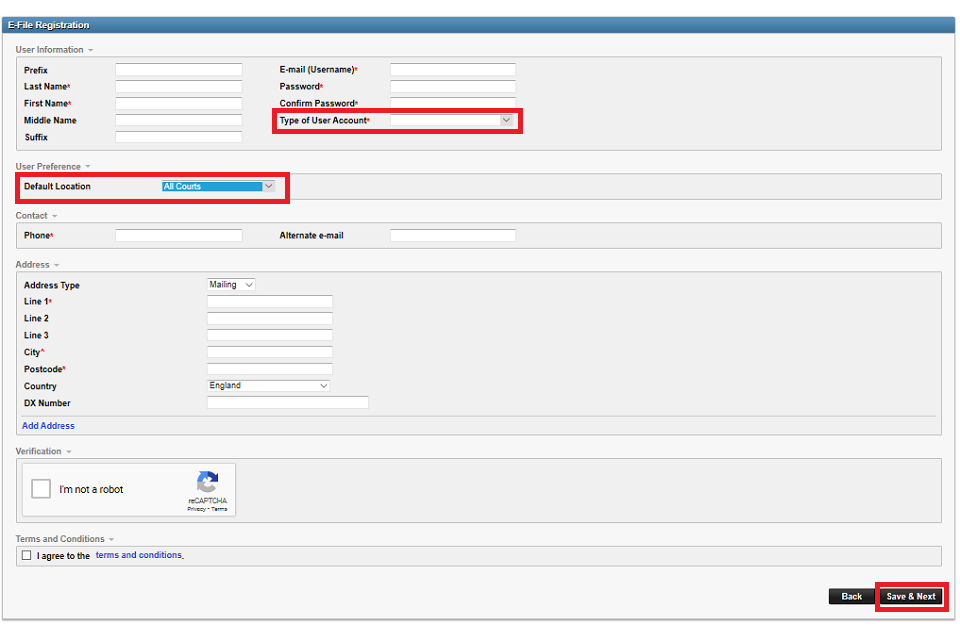
2. Complete the registration form using your email address as your username. There is guidance on the screen for creating your password. Select ‚Äòterms and conditions‚Ä� to understand how HMCTS uses your data.
3. If you are representing yourself choose ‚ÄòOther‚Ä� in ‚ÄòType of User Account‚Ä�.
4. If you are a legal professional choose ‚ÄòSolicitors Firm‚Ä�. If your firm is registered, your email address will link your account to your firm. If your firm is not registered, an error will show. Choose ‚ÄòOther‚Ä� and then contact E-Filing support to register your firm. Your account will then be linked to your firm within 24 hours.
5. If you are a barrister or counsel you can use ‚ÄòBarrister Chambers‚Ä� in ‚ÄòType of User Account‚Ä�. You will have access to submit filings but will not be able to access cases ‚Ä� these will be for your instructing solicitors to manage.
6. For ‚ÄòDefault Location‚Ä� the options are ‚ÄòAll Courts‚Ä�, ‚ÄòLondon Courts‚Ä� or ‚ÄòOutside of London Courts‚Ä�. Choose ‚ÄòAll Courts‚Ä�.
You can change this later by clicking on your name in the homepage heading bar and selecting ‚ÄòMy Account‚Ä�. You will be able to edit your information in the same way as the registration form.
7. Once the form is complete select ‚ÄòSave & Next‚Ä�.
8. A confirmation message will appear when your account is created. You will also receive an email.
9. Follow the link in the email to go back to the login page. If you have not received the email, please check your junk folder. If it’s not in there, please contact [email protected].
10. Enter your email address (username) and password and select ‚ÄòLogin‚Ä�. If you forget your login details, please select the forgot password link underneath the login page and follow the instructions provided.
11. When you have logged in, you will see a homepage where you can customise your dashboard.
12. If you enter your password incorrectly, your account will lock. You must wait 2 minutes before you can log back in. You can reset your password from the login screen.
3. Navigate the homepage
On the homepage you will find buttons for specific actions you can take.
1. ‚ÄòCase Search‚Ä� ‚Ä� this is where you can search for any cases where you are a party.
2. ‚ÄòCreate Filing‚Ä� ‚Ä� this is where you create the filing.
3. ‚ÄòFilings‚Ä� ‚Ä� you can select to see your filings ordered, or ‚Äòqueued‚Ä� by status (draft, submitted, rejected, approved, error).
4. My Matters ‚Ä� for legal professionals only. Search and find cases that are associated to your solicitors firm.
5. ‚ÄòPublic Search‚Ä� ‚Ä� this is where you can search for other cases on the system.
6. ‚ÄòCreate Office Copy Request‚Ä� ‚Ä� this is where you can request copies of documents.
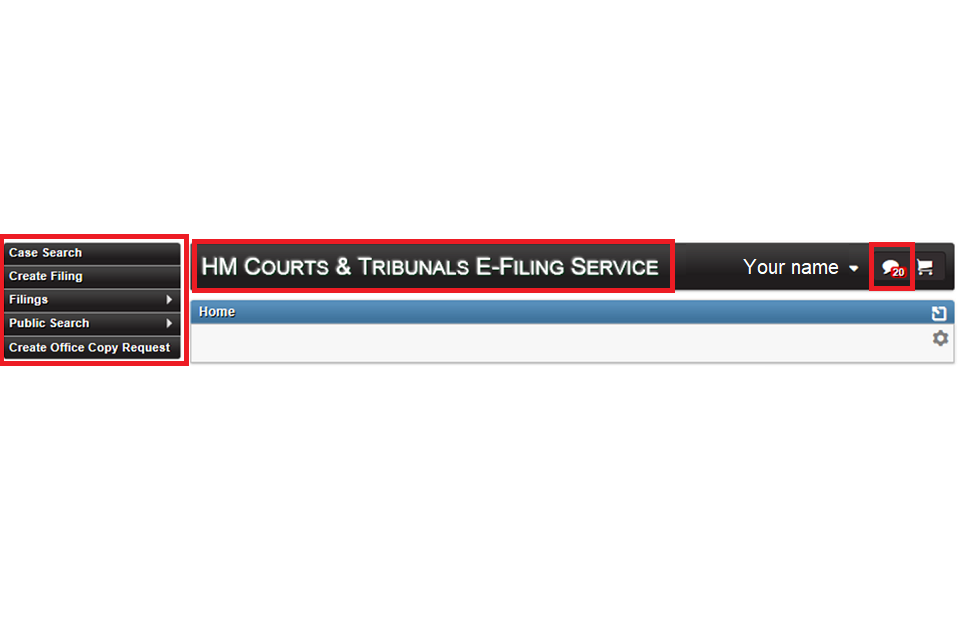
You can get back to the dashboard from any other screen by clicking on the ‚ÄòHM Courts & Tribunals E-filing Service‚Ä� heading at the top of the screen.
The speech bubble icon next to your name tells you how many notifications you have.
4. Change your notification preference
You can select if you would prefer to receive any notifications by email, within the portal or both. If you do not change this, you will receive notifications in both ways by default.
1. Select the arrow next to your name in the heading at the top of the screen and then choose ‚ÄòMy Account‚Ä�.
2. This will open the ‚ÄòUser Administration‚Ä� window. In ‚ÄòUser Information‚Ä� select the ‚ÄòNotification Type‚Ä� dropdown and choose ‚ÄòAll‚Ä� for both, ‚ÄòApplication Notifications‚Ä� or ‚ÄòE-Mail‚Ä�.
3. Select the ‚ÄòSave‚Ä� button to save the changes.
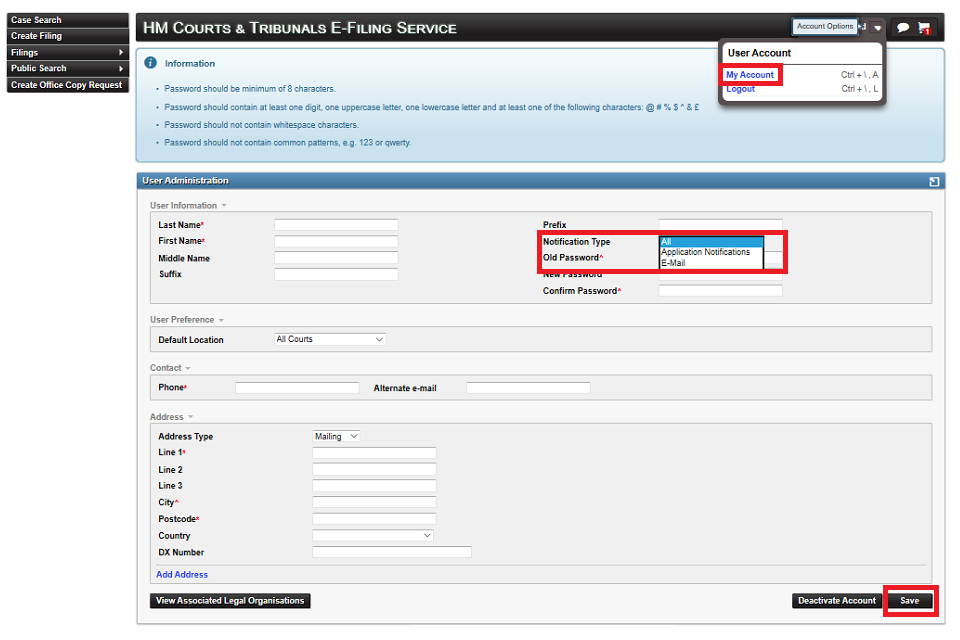
4. If you want to stop getting emails, go back to ‚ÄòMy Account‚Ä� and under ‚ÄòNotification Type‚Ä� select ‚ÄòApplication Notifications‚Ä�.
5. If you will be filing on behalf of a legal firm, you can link your account with your firm by selecting ‚ÄòMy Account‚Ä�, navigating to the bottom of the page and selecting ‚ÄòView Associated Legal Organisations‚Ä�.
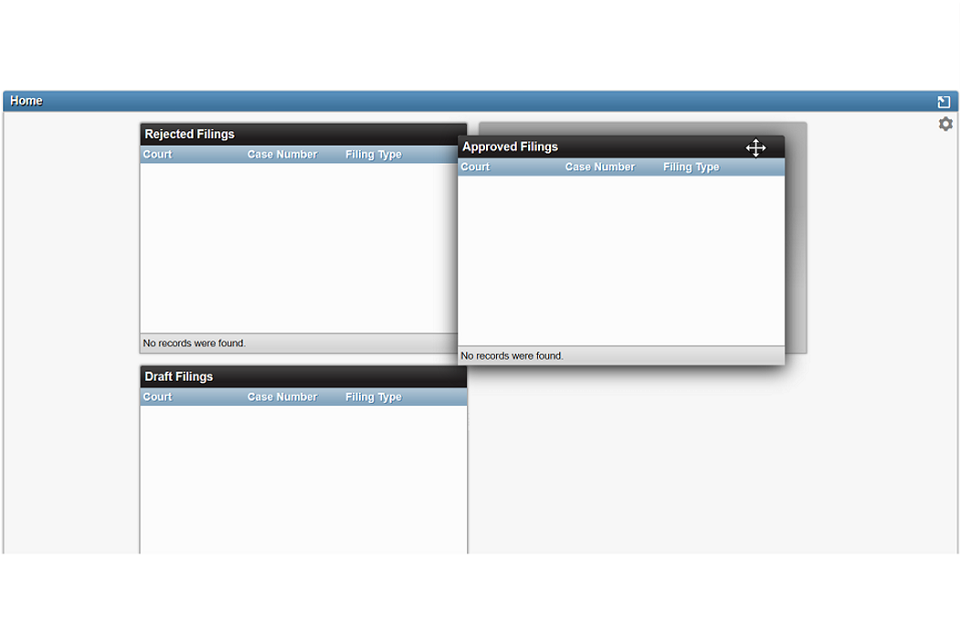
5. Customise your dashboard
You can customise the dashboard to display boxes showing statuses of filings so you can view any alerts or activity on your account. The E-Filing service calls these boxes ‚Äòwidgets‚Ä�
Follow these steps to add each widget.
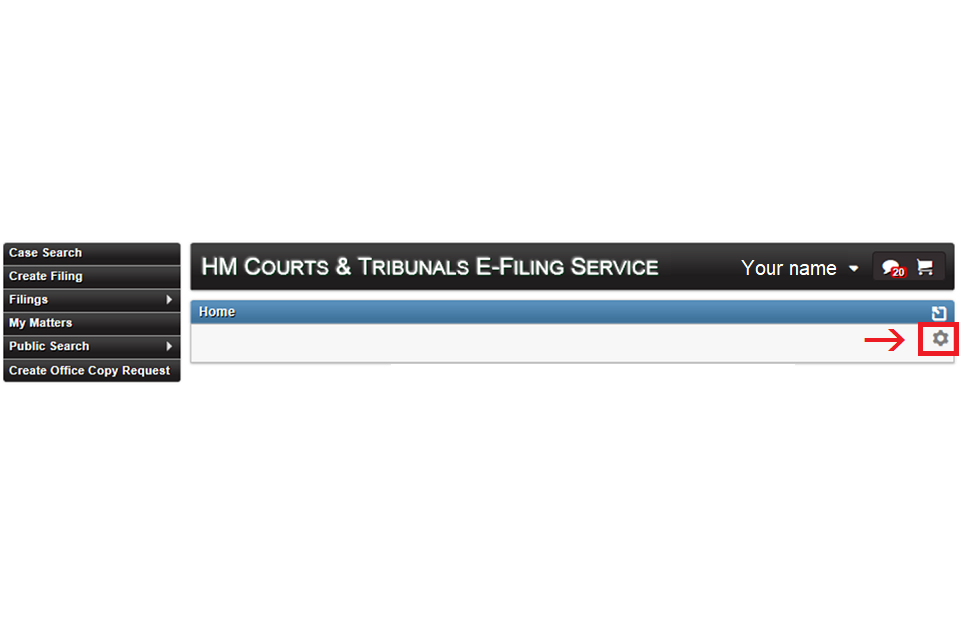
1. From the ‚ÄòHome‚Ä� box, select the ‚ÄòConfigure‚Ä� cog button.
2. From the ‚ÄòEdit Dashboard‚Ä� box, select the widgets you want to see on the dashboard. Then select ‚ÄòSave‚Ä�.
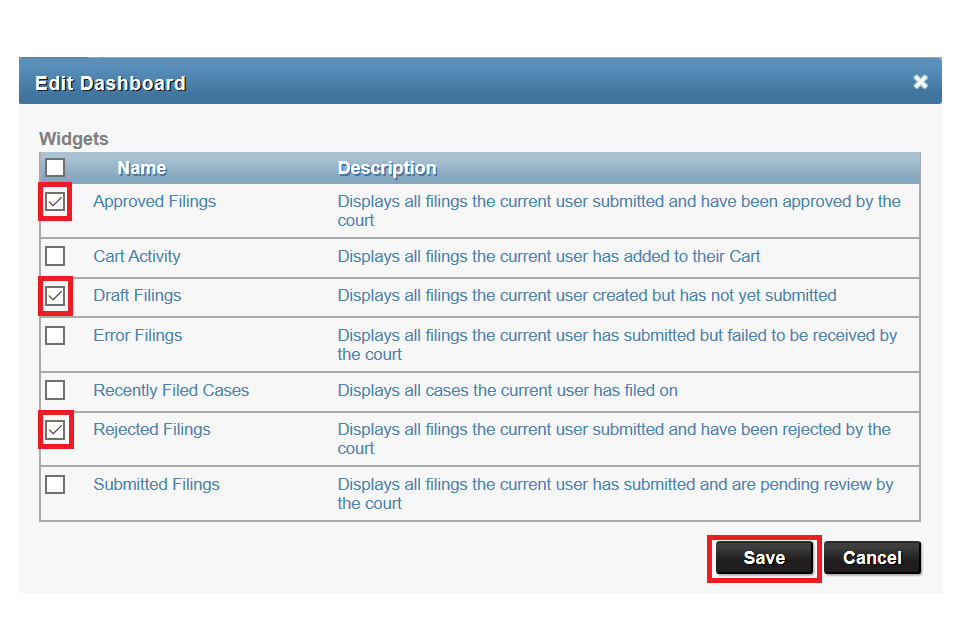
The widgets will appear on your dashboard. Updates to your filings will appear within the appropriate boxes.
3. You can move the widgets into a different order on the screen using ‚Äòclick and drag‚Ä�. Click on the black title bar of the widget you want to move and drag it to a new position.